Installing the SDS Software
IMPORTANT: The person installing the SDS Software must have administrative rights on the computer(s) where the installation is taking place for the installation to be successful. Refer to page 19 for specific Windows10 installation steps. NOTE: Software will not install on MacOS.
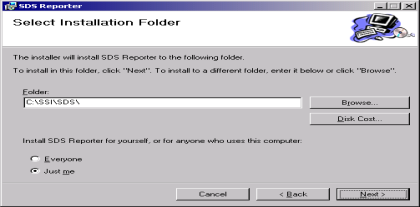
Double-click on the setup file, setup.exe, to start the auto-installation. (Avoid installing from SDSSetup.msi, as this will not install prerequisites if necessary.) If there is no version of the SDS Reporter running on the computer, the installation will prompt the user for the download location (Figure 11 - SDS Reporter setup screen).

Figure 11 - SDS Reporter setup screen
Prerequisites for installing SDS Reporter include .NET Framework 2.0, SQL CE 3.5, and either ActiveSync or Windows Mobile Device Center. The setup.exe program will check to make sure that these prerequisites are installed and, if necessary, install them.
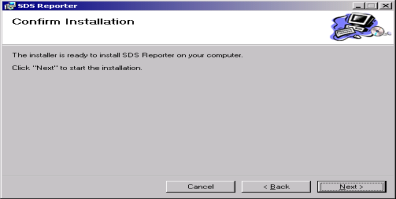
The default location is “C:\SSI\SDS”. Click on the “Browse” button to select an alternate location. Clicking on the “Disk Cost…” button will display the available computer drives onto which the SDS Reporter can be downloaded, as well as the total space, available space, and required space for each drive. Selecting the “Everyone” option will install the SDS Reporter for all users on the computer, while selecting the “Just me” option will only install the SDSReporter for the current user. Clicking on the “Cancel” button will prompt the user to confirm exiting the setup without continuing. Clicking on the “< Back” button will display the previous screen, which is the introduction screen for the installer. Clicking the “Next >” button will continue with the installation process (Figure 12 - Installation ready screen).

Figure 12 - Installation ready screen
Clicking on the “Cancel” button will prompt the user to confirm exiting the setup without continuing. Clicking on the “< Back” button will display the previous page, which is the installation setup page (Figure 11 - SDS Reporter setup screen). Clicking on the “Next >” button will install the software to the specified location. Once the software has been installed, the installer can be closed. The SDS Reporter software will now be ready to use.
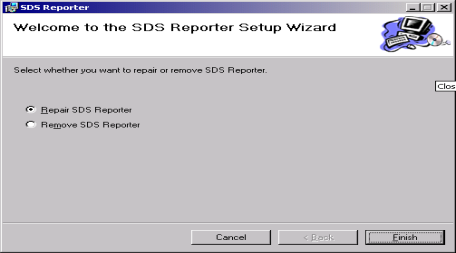
If there is a version of the SDS Reporter already installed on the computer, the installer will either re-install the software (Repair SDS Reporter option) or remove the software from the computer (Remove SDS Reporter option) (Figure 13 - Repair/Remove SDS Reporter screen). Clicking on the “Finish” button will proceed with the selected action. Note: The installer does not remove any subfolders in the main SDS folder. These files will have to be manually removed.
